
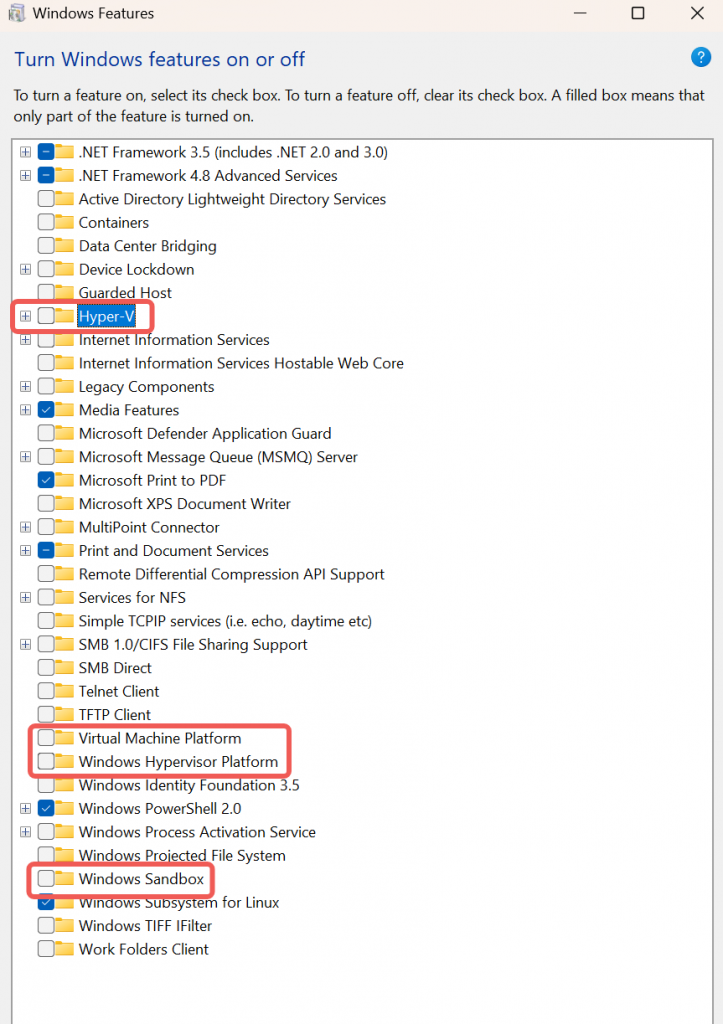
How to disable Hyper-V on Windows 11/10
Open the System Information panel.
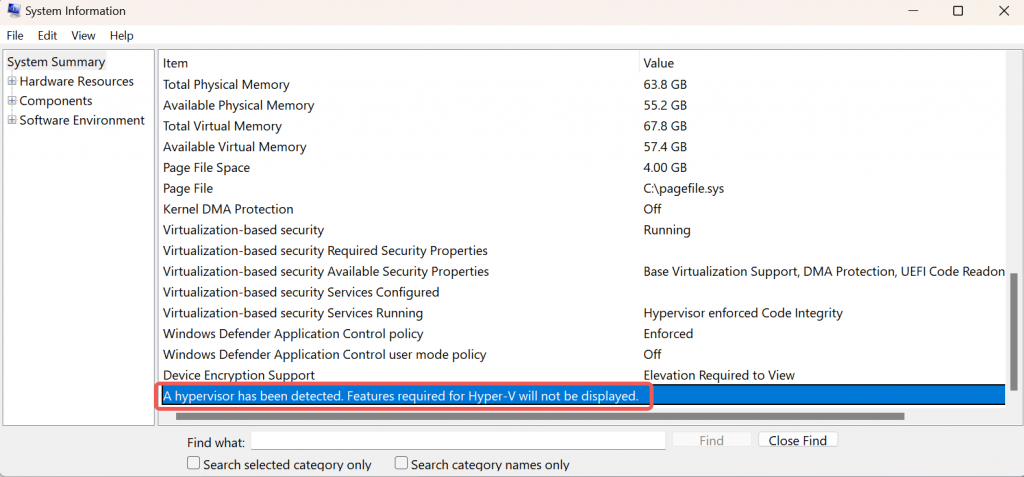
This indicates that Hyper-V monitoring has been detected, and at this time, VT-x will be hidden by Hyper-V.
Run PowerShell commands to check the status of Windows Hyper-V features.
$features = @(
    "Microsoft-Hyper-V",
    "Microsoft-Hyper-V-All",
    "HypervisorPlatform",
    "VirtualMachinePlatform",
    "Containers-DisposableClientVM"  # Windows Sandbox
)
foreach ($feature in $features) {
    $state = Get-WindowsOptionalFeature -Online -FeatureName $feature | Select-Object State
    Write-Host "$feature : $($state.State)"
}
===>
Microsoft-Hyper-V : Enabled
Microsoft-Hyper-V-All : Enabled
HypervisorPlatform : Enabled
VirtualMachinePlatform : Enabled
Containers-DisposableClientVM : Disabled
===>
Microsoft–Hyper–V : Disabled
Microsoft–Hyper–V–All : Disabled
HypervisorPlatform : Disabled
VirtualMachinePlatform : Disabled
Containers–DisposableClientVM : Disabled
Write-Host "VT-x: $((Get-WmiObject Win32_Processor).VirtualizationFirmwareEnabled)" -ForegroundColor Cyan;
Write-Host "Hyper-V: $((Get-WindowsOptionalFeature -Online -FeatureName Microsoft-Hyper-V).State)" -ForegroundColor Cyan
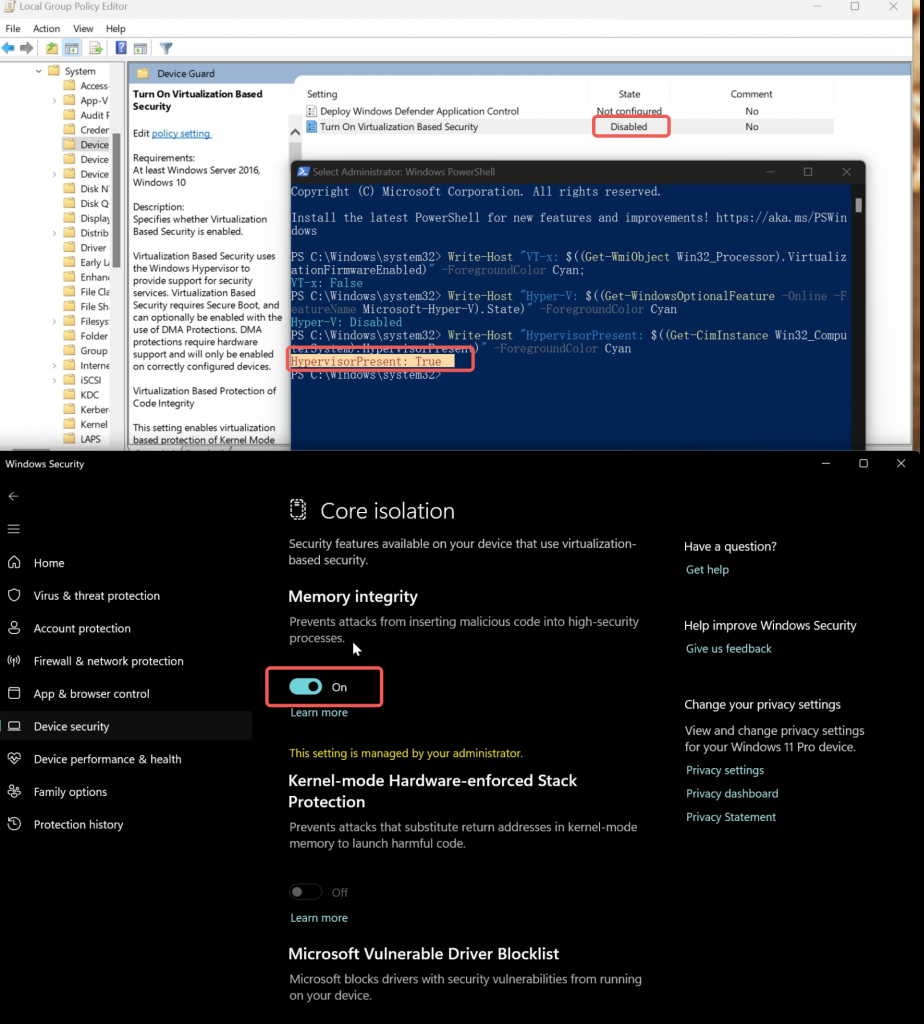
Write-Host "HypervisorPresent: $((Get-CimInstance Win32_ComputerSystem).HypervisorPresent)" -ForegroundColor CyanThe PowerShell command output still indicates that ‘HypervisorPresent’ is True.
=>
PS C:\Windows\system32> Write-Host “VT-x: $((Get-WmiObject Win32_Processor).VirtualizationFirmwareEnabled)” -ForegroundColor Cyan;
VT-x: False
PS C:\Windows\system32> Write-Host “Hyper-V: $((Get-WindowsOptionalFeature -Online -FeatureName Microsoft-Hyper-V).State)” -ForegroundColor Cyan
Hyper-V: Disabled
PS C:\Windows\system32> Write-Host “HypervisorPresent: $((Get-CimInstance Win32_ComputerSystem).HypervisorPresent)” -ForegroundColor Cyan
HypervisorPresent: True
PS C:\Windows\system32>
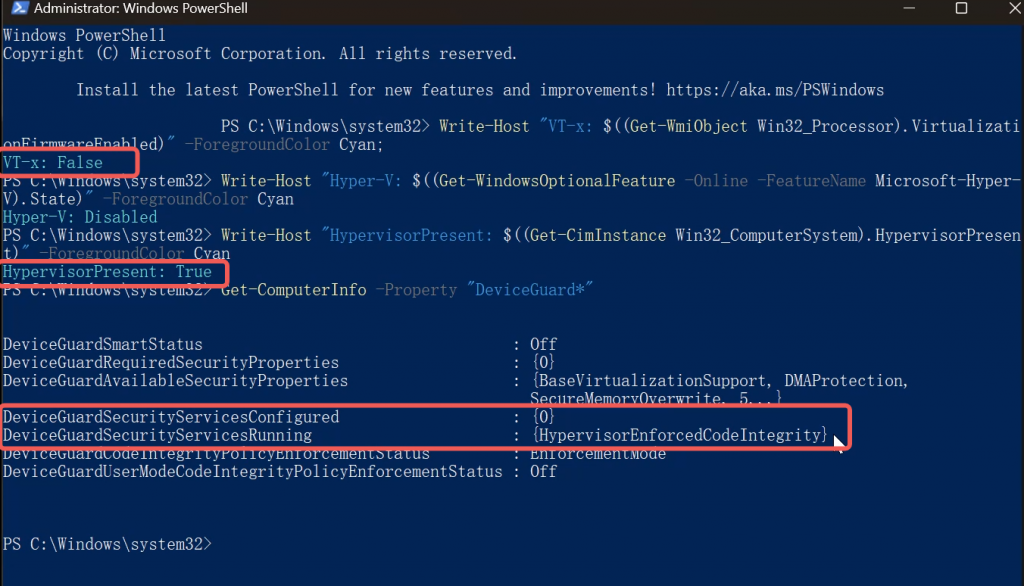
Run PowerShell commands to check Device Guard status.
Get-ComputerInfo -Property "DeviceGuard*"====>
DeviceGuardSmartStatus : Off
DeviceGuardRequiredSecurityProperties : {0}
DeviceGuardAvailableSecurityProperties : {BaseVirtualizationSupport, DMAProtection, 5, 6…}
DeviceGuardSecurityServicesConfigured : {HypervisorEnforcedCodeIntegrity}
DeviceGuardSecurityServicesRunning : {HypervisorEnforcedCodeIntegrity}
DeviceGuardCodeIntegrityPolicyEnforcementStatus : EnforcementMode
DeviceGuardUserModeCodeIntegrityPolicyEnforcementStatus : Off
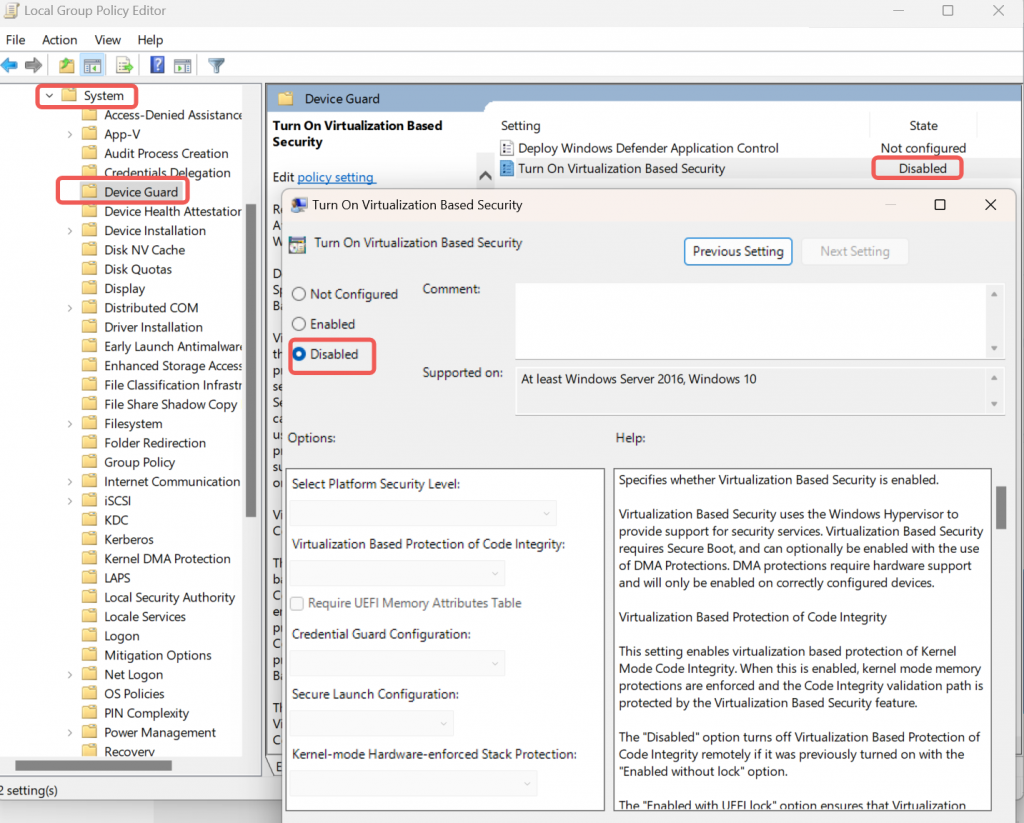
Open the Local Group Policy Editor, navigate to Virtualization-Based Security, and set it to Disabled.

PS C:\Windows\system32> Write-Host “VT-x: $((Get-WmiObject Win32_Processor).VirtualizationFirmwareEnabled)” -ForegroundColor Cyan;
VT-x: True
PS C:\Windows\system32> Write-Host “Hyper-V: $((Get-WindowsOptionalFeature -Online -FeatureName Microsoft-Hyper-V).State)” -ForegroundColor Cyan
Hyper-V: Disabled
PS C:\Windows\system32> Write-Host “HypervisorPresent: $((Get-CimInstance Win32_ComputerSystem).HypervisorPresent)” -ForegroundColor Cyan
HypervisorPresent: False
PS C:\Windows\system32>
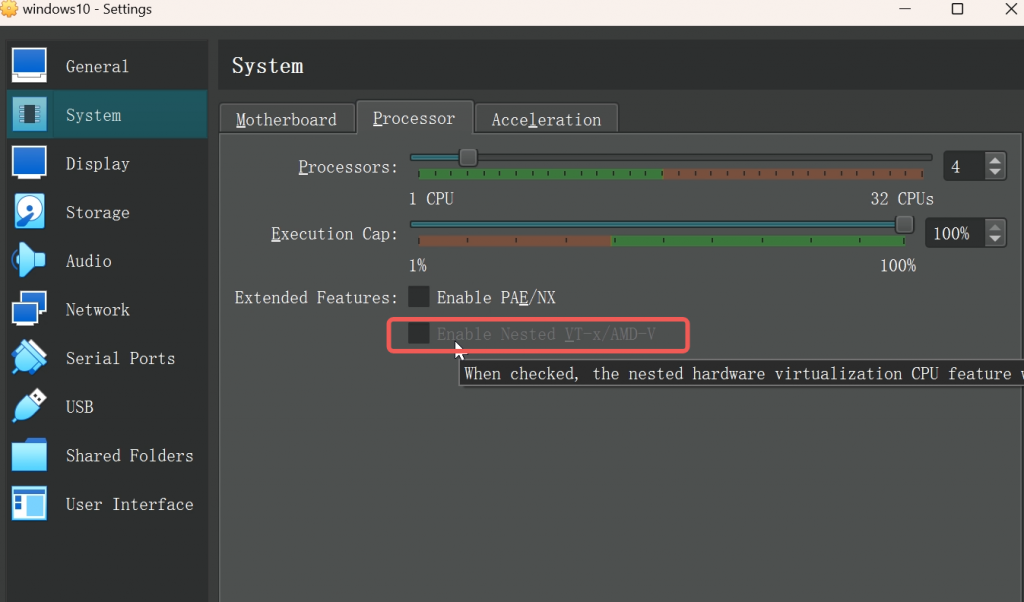
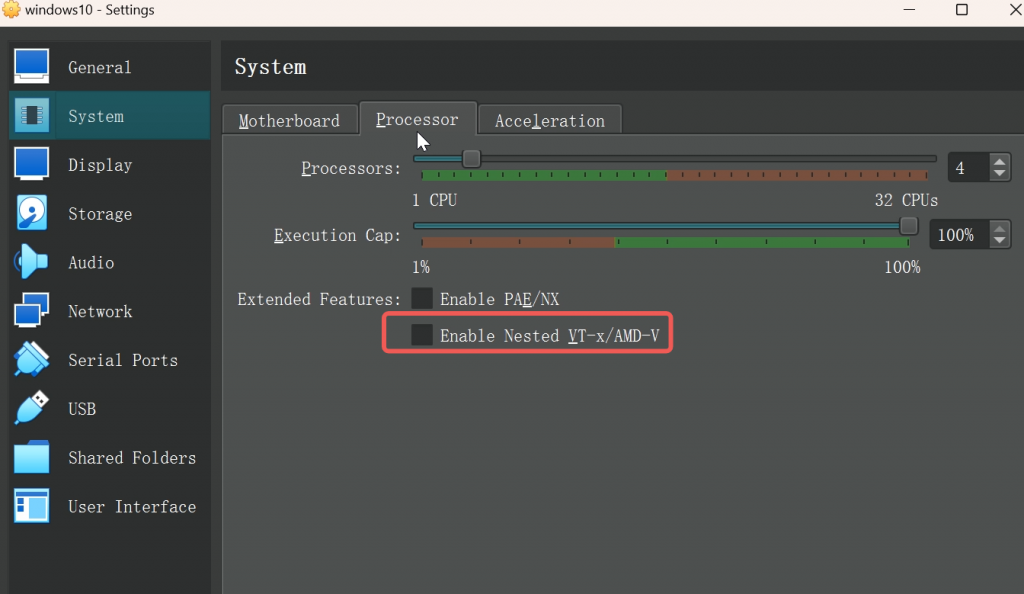
The VirtualBox “Enable Nested VT-x/AMD-V” option is enabled.
Open Windows Security, navigate to Device Security, click on Core Isolation, and set Memory Integrity to ON.
Note that at this point, hypervisorpresent will also be True.
https://learn.microsoft.com/en-us/troubleshoot/windows-client/application-management/virtualization-apps-not-work-with-hyper-v